Bitescape

Welcome to Bitescape, a journey through the world of flavors. Explore delicious recipes, savory creations, and sweet indulgences that inspire adventure with every bite. From simple comfort foods to bold culinary experiments, join us as we take you on a flavorful escape, one bite at a time.

  • Home
  • Download
  • Social
  • Contact Us


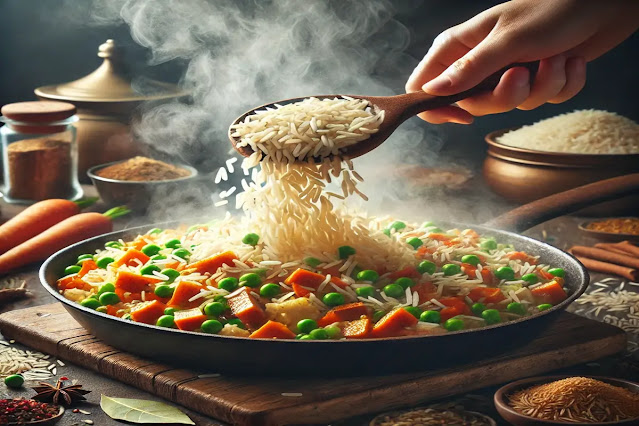
Veg Pulao is a delicious, aromatic, and easy-to-make rice dish packed with the flavors of whole spices, basmati rice, and mixed vegetables. It is a one-pot meal that is both light and satisfying, making it a great option for lunch, dinner, or even festive occasions. This dish is naturally gluten-free and can be made vegan by using oil instead of ghee.

Why You’ll Love This Recipe

  • Simple and easy to prepare in under 40 minutes.
  • Requires minimal ingredients but delivers rich flavors.
  • Perfect as a main dish or as a side with dals, curries, or yogurt-based dishes.
  • Customizable with your favorite vegetables and seasonings.

Ingredients

For Cooking Rice:

  • 1 cup basmati rice (soaked for 20 minutes)
  • 2 cups water
  • 1 bay leaf
  • 1-inch cinnamon stick
  • 2 green cardamoms
  • 2 cloves
  • 1/2 teaspoon salt

For Pulao:

  • 2 tablespoons ghee or oil
  • 1 teaspoon cumin seeds
  • 1 bay leaf
  • 1-inch cinnamon stick
  • 2 green cardamoms
  • 2 cloves
  • 1 medium onion, thinly sliced
  • 1 teaspoon ginger-garlic paste
  • 1 green chili, slit (adjust to spice preference)
  • 1/2 cup chopped carrots
  • 1/2 cup green peas
  • 1/2 cup beans, chopped
  • 1/4 teaspoon turmeric powder
  • 1/2 teaspoon garam masala
  • 1/2 teaspoon coriander powder
  • Salt to taste
  • 1 tablespoon chopped coriander leaves
  • 1 tablespoon fried cashews (optional, for garnish)

Instructions

Step 1: Cooking the Rice

  1. Wash the basmati rice 2–3 times until the water runs clear. Soak it for 20 minutes and drain before cooking.
  2. In a pan, boil 2 cups of water. Add a bay leaf, cinnamon, cardamoms, cloves, and salt.
  3. Add the soaked rice to the boiling water. Cook until the rice is 90% done (it should still have a slight bite).
  4. Drain the rice and keep it aside. This step prevents the pulao from becoming mushy.


Step 2: Preparing the Pulao Base

  1. Heat ghee or oil in a heavy-bottomed pan. Add cumin seeds and let them splutter.
  2. Add bay leaf, cinnamon, cardamoms, and cloves. Sauté for a few seconds until aromatic.
  3. Add sliced onions and cook until they turn golden brown. This adds depth to the flavor.
  4. Stir in ginger-garlic paste and green chili. Cook for about a minute until the raw smell disappears.


Step 3: Cooking the Vegetables

  1. Add chopped carrots, green peas, and beans. Stir-fry for 2-3 minutes on medium heat.
  2. Sprinkle turmeric, garam masala, coriander powder, and salt. Mix well to coat the vegetables.
  3. Pour in 2-3 tablespoons of water to help the spices blend into the vegetables. Cover and cook for 3 minutes.


Step 4: Mixing the Rice and Final Touches

  1. Add the partially cooked rice to the pan.
  2. Gently mix everything, ensuring that the rice grains do not break.
  3. Cover with a lid and let the pulao steam on low heat for 5 minutes to absorb all the flavors.


Step 5: Garnishing and Serving

  1. Turn off the heat and let the pulao rest for a few minutes.
  2. Garnish with chopped coriander leaves and fried cashews for extra flavor and crunch.
  3. Serve hot with raita, yogurt, or a side of dal.

Tips & Variations

✅ For extra flavor, add a few strands of saffron soaked in warm milk and drizzle it over the rice before steaming.
✅ To make it richer, toss in some fried paneer cubes or add a handful of golden raisins for a mild sweetness.
✅ For a South Indian twist, add curry leaves and a tablespoon of grated coconut while sautéing the spices.
✅ For a restaurant-style touch, mix in a little coconut milk along with the vegetables for a creamy texture.
✅ For spicy pulao, increase the number of green chilies or add a pinch of red chili powder.


Serving Suggestions

  • Serve Veg Pulao hot with a bowl of cucumber raita, boondi raita, or plain yogurt for a refreshing combination.
  • Pair it with a dal tadka or paneer curry for a more filling meal.
  • Serve alongside papad, pickle, and a salad for a complete, wholesome meal.


Final Thoughts

Veg Pulao is a classic dish that combines the simplicity of rice with the richness of aromatic spices and vegetables. Whether you are making it for a quick weekday meal or a special occasion, it is sure to impress with its flavor and presentation. Try this easy recipe today and enjoy a wholesome, comforting dish!

(FAQ's)

1. What is Veg Pulao?

Veg Pulao is a one-pot rice dish made with basmati rice, mixed vegetables, and whole spices. It is mildly spiced and has a fragrant, rich flavor. It is different from biryani, as it is simpler, lighter, and quicker to prepare.

2. What is the difference between Pulao and Biryani?

  • Pulao is a one-pot dish where rice and vegetables are cooked together with mild spices.
  • Biryani is layered and slow-cooked, with rice and curry (gravy-based masala) prepared separately before assembling. Biryani also has stronger, more complex flavors.

3. Which rice is best for making Pulao?

Long-grain Basmati rice is the best choice for pulao as it remains fluffy and non-sticky after cooking. However, you can also use sona masoori or jeera samba rice for variations.

4. Can I make Veg Pulao in a pressure cooker or Instant Pot?

  Yes!

  • Pressure Cooker: Sauté the spices and vegetables, add soaked rice and water (1.5 cups for 1 cup rice), and cook for 1 whistle on medium heat.
  • Instant Pot: Use the sauté mode for spices and vegetables, then pressure cook for 5 minutes with a natural pressure release.

5. How do I prevent Veg Pulao from becoming mushy?

  • Use the right water-to-rice ratio (2 cups for 1 cup rice).
  • Do not overcook the rice. Cook until 90% done, then steam it with the vegetables.
  • Soak basmati rice before cooking for fluffy grains.
  • Avoid excessive stirring to prevent breaking the rice.

6. Can I make Pulao without onion and garlic?

Yes! Skip the onions and garlic, and instead, add more whole spices like bay leaves, cinnamon, and cloves for extra flavor. You can also add a pinch of asafoetida (hing) for a mild umami taste.

7. How can I make Pulao more flavorful?

  • Use ghee instead of oil for a richer taste.
  • Add a few strands of saffron soaked in milk for a restaurant-style touch.
  • Toast the whole spices before adding other ingredients to release their aroma.
  • Garnish with fried cashews, raisins, or caramelized onions for extra flavor.

8. What vegetables can I add to Pulao?

Common vegetables include carrots, peas, beans, potatoes, cauliflower, capsicum, and corn. You can customize it with seasonal veggies like mushrooms, bell peppers, or spinach.

9. How can I store leftover Veg Pulao?

  • Store cooled pulao in an airtight container in the refrigerator for up to 2 days.
  • Reheat with a few drops of water or ghee to restore moisture.
  • Avoid freezing, as it can make the rice dry and grainy.

10. What are the best side dishes for Pulao?

  • Raita (Cucumber Raita, Boondi Raita, Mint Raita)
  • Dal (Dal Tadka, Dal Makhani)
  • Curry (Paneer Butter Masala, Chole, Korma)
  • Pickles and Papad for crunch and spice


Gulab Jamun the melt-in-your-mouth Indian sweet, gets a unique twist in this Curd Gulab Jamun recipe! Instead of using traditional khoya or milk powder, we use curd (yogurt) to create soft, spongy dumplings soaked in aromatic sugar syrup. If you love classic sweets but want to try something different, this is the perfect recipe for you!


Why You’ll Love This Recipe

✔️ Unique & Delicious – A tangy twist on a classic dessert.
✔️ Soft & Spongy Texture – Thanks to the magic of curd!
✔️ Easy to Make – No need for khoya or complicated ingredients.
✔️ Perfect for Festive Occasions – A treat everyone will love!


Ingredients You'll Need

For the Jamun Balls:

  • 1 cup fresh curd (yogurt) – Thick and full-fat for best results
  • ½ cup all-purpose flour (maida)
  • 2 tbsp milk powder (optional, for extra richness)
  • ½ tsp baking soda
  • 1 tbsp ghee (clarified butter)
  • A pinch of salt
  • Oil or ghee for frying


For the Sugar Syrup:

  • 1 ½ cups sugar
  • 1 ½ cups water
  • 4-5 cardamom pods, crushed
  • 1 tsp rose water (optional, for fragrance)
  • A few saffron strands (optional)

Step-By-Step Process


Step 1: Prepare the Dough


  1. In a mixing bowl, whisk the curd until smooth.
  2. Add all-purpose flour, milk powder, baking soda, salt, and ghee.
  3. Gently mix everything to form a soft, sticky dough. Avoid overmixing.
  4. Let the dough rest for 10-15 minutes.


Step 2: Make the Sugar Syrup


  1. In a saucepan, mix sugar and water.
  2. Bring it to a boil, stirring occasionally until the sugar dissolves.
  3. Add crushed cardamom, rose water, and saffron.
  4. Simmer for 5 minutes until slightly sticky (but not too thick). Keep warm.

Step 3: Shape and Fry the Jamuns


  1. Grease your hands with ghee and roll small portions of the dough into smooth balls.
  2. Heat oil or ghee in a deep pan on low-medium heat.
  3. Fry the balls until golden brown, stirring gently for even cooking.
  4. Remove and drain excess oil on a paper towel.


Step 4: Soak in Syrup


  1. Immediately add the fried jamuns to the warm sugar syrup.
  2. Let them soak for at least 1-2 hours so they absorb the flavors and become soft.
  3. Garnish with chopped nuts and serve warm.


Pro Tips for the Perfect Curd Gulab Jamun

✔ Use thick curd – Avoid watery curd to prevent a sticky dough.
✔ Don’t over-knead – A gentle mix is enough; overmixing makes them dense.
✔ Fry on low-medium heat – This ensures even cooking without burning.
✔ Let them soak well – The longer they sit in the syrup, the softer they get!


Serving Suggestions

🍯 Warm and fresh – Perfect for festivals or celebrations.
🍦 With vanilla ice cream – A heavenly combo of hot and cold.
🍵 Alongside masala chai – A delightful tea-time treat!


Health Benefits of Curd Gulab Jamun

Believe it or not, this dessert has some benefits too!
✔ Curd aids digestion – Probiotics keep your gut happy.
✔ Less fat than khoya versions – A lighter alternative to traditional recipes.
✔ Homemade and preservative-free – No artificial ingredients, just pure goodness.


Final Thoughts

Curd Gulab Jamun is a simple yet delightful way to enjoy a traditional dessert with a unique twist. Whether you’re making it for a festival, celebration, or just to satisfy your sweet cravings, this recipe is sure to impress!

So why wait? Try this out and let the rich, syrupy goodness melt in your mouth! 🍯✨


(FAQ's)

1. Can I use flavored yogurt?
It’s best to use plain, full-fat yogurt for the right texture. Flavored yogurt may alter the taste.

2. My dough is too sticky. What should I do?
Add a little more flour and let it rest for a few extra minutes.

3. Can I bake instead of frying?
Yes! Bake at 180°C (350°F) for about 15-20 minutes until golden, then soak in syrup.

4. How long can I store these Gulab Jamuns?
They stay fresh in the fridge for up to 5 days. Warm slightly before serving.

5. Can I use whole wheat flour instead of all-purpose flour?
Yes, but it will slightly change the texture. The jamuns may be denser.


A Dessert That Feels Like a Warm Hug

Some desserts are more than just food—they are memories on a plate. The aroma of roasted suji, the rich taste of ghee, and the melt-in-the-mouth sweetness instantly take us back to childhood celebrations, festive mornings, and cozy family gatherings.

Suji Ka Makhandi Halwa is one such dessert—simple yet luxurious, traditional yet timeless. Made with semolina (suji), ghee, milk, and sugar, this halwa has a rich, velvety texture that’s different from the regular suji halwa. It’s slow-cooked to perfection, giving it an indulgent, pudding-like consistency that’s hard to resist!

Whether you’re celebrating a festival, preparing prasad, or just craving something warm and sweet, this recipe is pure comfort in every bite.


Why You'll Love This Recipe

✔ Luxuriously creamy – Unlike regular suji halwa, this one has a silky, slow-cooked texture.
✔ Made with simple ingredients – You probably already have everything in your kitchen!
✔ Perfect for celebrations – A popular dessert for prasad, festivals, and weddings.
✔ Rich & flavorful – The ghee-roasted suji and slow simmering bring out deep, nutty flavors.


Ingredients You’ll Need

For the Halwa:

🥄 ½ cup suji (semolina/rava) – The heart of this dish!
🧈 ½ cup ghee (clarified butter) – For that authentic richness.
🥛 2 cups milk – Gives the halwa its creamy texture.
🍚 ½ cup sugar – Adjust to your taste.
✨ ½ tsp cardamom powder – For a warm, aromatic touch.
🥜 8-10 almonds, cashews (chopped) – Adds crunch and nuttiness.
🍇 8-10 raisins (optional) – A pop of sweetness.
💛 Saffron strands (optional, for a royal touch).


Step-By-Step Recipe

Step 1: Roast the Suji

🔥 Heat ghee in a pan and add suji.
🥄 Roast it slowly on low heat, stirring continuously until it turns golden brown and gives off a nutty aroma.
💡 Tip: Patience is key! Slow roasting enhances the flavor.

Step 2: Warm the Milk

🥛 In a separate saucepan, heat milk until warm but not boiling.
✨ Add saffron strands and cardamom powder for extra flavor.

Step 3: Combine the Suji and Milk

🌾 Slowly pour the warm milk into the roasted suji while stirring constantly.
🔥 Cook on low heat, stirring continuously to prevent lumps.
🥜 Add chopped nuts and raisins at this stage for added texture.

Step 4: Sweeten & Simmer

🍚 Add sugar and continue cooking until the halwa thickens to a silky, pudding-like consistency.
🥄 Stir well until the ghee starts to separate slightly from the halwa.

Step 5: Garnish & Serve

🥜 Sprinkle some extra chopped nuts on top.
🍛 Serve warm, drizzled with a little extra ghee for that authentic touch.


Pro Tips for the Best Suji Makhandi Halwa

💡 Use full-fat milk – This makes the halwa extra creamy and rich.
💡 Roast suji slowly – It enhances the nutty flavor and prevents raw taste.
💡 Don’t rush the process – Simmering slowly gives it that silky, pudding-like texture.
💡 Adjust sweetness – You can add more or less sugar based on your preference.


How to Enjoy Suji Ka Makhandi Halwa

✅ As Prasad – A traditional offering during festivals and pujas.
✅ With Poori – The ultimate halwa-poori combo for special occasions!
✅ On Winter Mornings – A warm, comforting breakfast treat.
✅ With a Cup of Chai – Perfect for those cozy evenings.


Want a Healthier Version? Try This!

🌿 Replace sugar with jaggery – Adds a natural sweetness and earthy flavor.
🥜 Use less ghee – But don’t skip it entirely—it enhances the taste!
🥛 Use almond milk – A great dairy-free alternative.
🍯 Add flaxseeds or sunflower seeds – For an extra nutritional boost.


Why Homemade Halwa is Special

Making this halwa at home means you get to control the ingredients, adjust the sweetness, and enjoy the freshest flavors. There’s something magical about the way your kitchen smells when suji is roasting in ghee, mixed with hints of cardamom and saffron. It’s the kind of dessert that feels like a warm hug—comforting, indulgent, and full of love.

So the next time you crave something sweet, rich, and traditional, try Suji Ka Makhandi Halwa. Trust me, one spoonful, and you’ll be hooked! 😍


Have you tried this recipe? Let me know your favorite way to enjoy it in the comments !


(FAQ's)

1. What is the difference between regular suji halwa and Makhandi halwa?

Regular suji halwa is cooked quickly with water or milk, whereas Makhandi halwa is slow-cooked with full-fat milk, giving it a thicker, creamier texture similar to pudding.

2. Can I make this halwa without ghee?

Ghee adds richness and flavor, but you can use a little oil or reduce the amount. However, for the authentic taste, some ghee is recommended.

3. How can I make this halwa healthier?

✔ Use jaggery instead of sugar for natural sweetness.
✔ Use less ghee or replace some with coconut oil.
✔ Add flaxseeds or sunflower seeds for extra nutrition.

4. Why is my halwa turning dry instead of creamy?

This happens if you don’t add enough milk or cook it on high heat. Always cook it on low flame, stirring continuously, and add extra warm milk if needed.

5. Can I store this halwa? How long does it last?

Yes! Store it in an airtight container in the fridge for up to 3-4 days. Reheat with a splash of milk to bring back the soft texture.

6. What’s the best way to serve Suji Ka Makhandi Halwa?

It’s best served warm, garnished with chopped nuts and saffron, and drizzled with a little extra ghee for that authentic taste.

7. Can I make this halwa for prasad or festivals?

Absolutely! Suji Ka Makhandi Halwa is often made for pujas, prasad, and festive occasions, making it a divine and traditional sweet treat.


A Traditional Indian Condiment with a Punch

If you’re a fan of bold flavors and crunchy textures, curd chillies (Dahi Mirchi or Mor Milagai) are a must-try! This age-old South Indian delicacy is a fantastic way to preserve green chilies while adding a tangy, umami-packed twist to your meals. Sun-dried to perfection and fried until crisp, these little flavor bombs are the perfect sidekick to curd rice, dal-rice, or even plain khichdi.

Let’s take a journey through the step-by-step process of making this spicy, addictive condiment at home.


What Are Curd Chillies?

Curd chillies are green chilies marinated in a spiced yogurt mixture, sun-dried until crisp, and later fried to a golden-brown perfection. They add a spicy crunch to simple meals and are often enjoyed with South Indian cuisine.

Why You'll Love This Recipe

✔️ Minimal Ingredients – Just a handful of pantry staples!
✔️ Long Shelf Life – Once dried, they last for months.
✔️ Burst of Flavor – A perfect mix of heat, tang, and crunch.
✔️ Versatile Side Dish – Pairs well with rice, dal, or yogurt-based meals.


Ingredients You'll Need

  • 20-25 fresh green chilies (Jwala, Bird’s Eye, or Thai chilies work best)
  • 1 cup thick curd (yogurt) – Preferably homemade or full-fat for best results
  • 1 tbsp salt – Adjust according to taste
  • ½ tsp turmeric powder – Adds color and antibacterial benefits
  • ½ tsp asafoetida (hing) (optional) – Enhances digestion and flavor

Step-By-Step Process

Step 1: Prepping the Chilies

Wash the green chilies thoroughly and pat them dry. Slit them lengthwise just enough for the flavors to seep in, but keep them whole.

Step 2: The Yogurt Marinade

In a bowl, whisk the thick curd and mix in salt, turmeric, and asafoetida. Add the chilies and coat them well. Cover and let them marinate for 1-2 days, stirring occasionally.

Step 3: Sun-Drying for Preservation

Spread the marinated chilies on a clean tray under direct sunlight. Let them dry for 3-5 days, flipping them occasionally until they turn wrinkled and off-white.

Step 4: Storing the Dried Chilies

Once completely dry, store the chilies in an airtight container. They’ll last for months!

Step 5: Frying & Serving

When ready to eat, heat oil in a pan and fry the dried chilies until crispy and golden brown. Serve hot with curd rice or a simple dal-rice combo.


Pro Tips for the Perfect Curd Chillies

✔ Use thick curd – This prevents excess moisture and speeds up drying.
✔ Sun-dry properly – They should be completely dry before storing to avoid spoilage.
✔ Adjust spice levels – For a milder version, use less spicy chilies or deseed them.
✔ Fry on medium heat – High heat can burn the chilies too quickly.


How to Enjoy Curd Chillies


Curd chilies are a game-changer when it comes to simple meals! Try pairing them with:
✅ Curd rice – The ultimate South Indian comfort food.
✅ Dal-rice or khichdi – Adds a spicy crunch to mellow flavors.
✅ Rasam or sambar – A side that enhances every bite.
✅ Parathas or roti – An unconventional but delicious pairing!


Health Benefits

Believe it or not, these fiery delights come with health perks!
✔ Aids digestion – Thanks to probiotics in curd and asafoetida.
✔ Boosts metabolism – Capsaicin in chilies helps burn fat.
✔ Preservative-free – A natural, homemade condiment.


Final Thoughts

Making curd chilies at home is easier than you think, and the results are totally worth it. Whether you’re preserving excess chilies or simply want to add an extra zing to your meals, this traditional recipe is a keeper!

So, the next time you’re looking for a crunchy, spicy side dish, give this recipe a try. Your taste buds will thank you!


(FAQ's) 

1. What type of chilies are best for making curd chillies?

Slender, medium-spicy green chilies like Thai chilies, Bird’s Eye chilies, or Indian varieties such as Jwala or Bhavnagri work best. They absorb the curd mixture well and dry efficiently.

2. How long should the chilies be marinated in the curd mixture?

Chilies should be marinated for at least 1-2 days, ensuring they soak up the flavors well. Stir occasionally to evenly coat them.

3. How long does it take to sun-dry the chilies?

Sun-drying typically takes 3-5 days, depending on the weather. They should be completely dehydrated, turning wrinkled and off-white before storing or frying.

4. Can I dry the chilies indoors if there’s no sunlight?

Yes, you can use an oven at low heat (50-60°C or 120-140°F) or a food dehydrator to dry them gradually. However, sun-drying gives the best texture and flavor.

5. How do I store dried curd chilies?

Store them in an airtight container in a cool, dry place. They stay fresh for several months if kept away from moisture.

6. How do I fry curd chilies properly?

Heat oil on medium heat and fry the dried chilies until they turn crisp and golden-brown. Avoid high heat, as they burn quickly.

7. What dishes pair well with curd chilies?

Curd chilies are a great side dish for:

  • Curd rice (South Indian-style)
  • Dal-rice or khichdi
  • Buttermilk-based dishes
  • Simple roti or paratha meals

8. Can I make a less spicy version?

Yes! Use milder chilies like banana peppers or de-seed the chilies before marinating them. This reduces the heat while maintaining flavor.

9. What are the health benefits of curd chillies?

  • Fermented curd aids digestion.
  • Green chilies boost metabolism and immunity.
  • Sun-drying preserves nutrients without artificial additives.

10. Can I reuse the leftover curd marinade?

No, it’s best to discard the leftover curd mixture, as it may contain moisture from the chilies, which can lead to spoilage.


A Dish That’s Love at First Bite

There’s something magical about the combination of succulent prawns, aromatic spices, and a rich, flavorful masala. One bite, and you’re transported straight to the coastal kitchens of India, where seafood is cooked with passion and tradition.

Spicy Prawn Masala is one of those dishes that warms the soul and sets your taste buds on fire (in the best way possible!). It’s a bold and vibrant dish where juicy prawns soak up a luscious, spicy gravy, made with onions, tomatoes, and an irresistible blend of Indian spices.

Whether you’re a seafood lover or just looking to spice up your dinner menu, this dish is a must-try! Serve it with steamed rice, roti, or paratha, and watch it disappear in minutes!


Why You’ll Love This Recipe

✔ Packed with flavor – A mix of spices, onions, and tomatoes create a rich, bold masala.
✔ Quick & easy – Ready in just 30 minutes, making it perfect for weeknight dinners.
✔ Juicy & tender prawns – No overcooked, rubbery prawns here—just perfectly cooked seafood!
✔ Versatile – Serve it with rice, roti, or dosa for an unforgettable meal.


Ingredients You’ll Need

For the Masala:

🦐 250g prawns (cleaned & deveined) – The star of the dish!
🧅 2 onions (finely chopped) – Forms the flavorful base.
🍅 2 tomatoes (pureed or finely chopped) – Adds richness and tang.
🧄 1 tbsp ginger-garlic paste – Essential for deep, aromatic flavors.
🌿 1-2 green chilies (slit) – For extra spice!
🌿 1 tsp mustard seeds – Traditional coastal touch.

For the Spice Mix:

🌶️ 1 tsp red chili powder – Adjust to your spice level.
🥄 ½ tsp turmeric powder – Adds color and depth.
🍛 1 tsp coriander powder – Balances flavors beautifully.
🧂 Salt (to taste) – Brings everything together.
🥄 ½ tsp garam masala – The final flavor boost!
🌿 Fresh coriander leaves (for garnish) – Because freshness matters.


Step-By-Step Recipe

Step 1: Prep the Prawns

🦐 Clean and devein prawns.
🧂 Marinate with turmeric, salt, and a little chili powder for 10 minutes.

Step 2: Sauté the Aromatics

🔥 Heat oil in a pan and add mustard seeds.
🧅 Add chopped onions and cook until golden brown.
🧄 Stir in ginger-garlic paste and sauté until fragrant.

Step 3: Make the Masala

🍅 Add tomatoes and cook until soft and mushy.
🌶️ Add red chili powder, coriander powder, salt, and garam masala.
🔥 Cook until oil separates from the masala (this is key for rich flavor!).

Step 4: Cook the Prawns

🦐 Add the marinated prawns and mix well.
🔥 Cook for 5-7 minutes on medium heat until prawns turn pink and tender.
🌿 Garnish with fresh coriander leaves.

Step 5: Serve & Enjoy!

🍛 Serve hot with steamed rice, roti, or dosa. Enjoy the burst of flavors in every bite!


Pro Tips for the Best Prawn Masala

💡 Don't overcook prawns – They cook quickly; overcooking makes them rubbery.
💡 Use fresh prawns – Fresher prawns give better flavor and texture.
💡 Let the masala cook properly – Always cook until oil separates for deep flavors.
💡 For extra heat, add more green chilies or a dash of pepper.


What to Serve with Spicy Prawn Masala?

✅ Steamed rice – Classic combo, lets the flavors shine.
✅ Jeera rice or ghee rice – A fragrant, rich pairing.
✅ Roti or paratha – Soaks up the masala beautifully.
✅ Neer dosa – A soft, spongy South Indian delight!


Healthier Alternatives

🌿 Use less oil – Cut down on oil but still get great flavor.
🥦 Add veggies – Try bell peppers, spinach, or mushrooms for extra nutrition.
🍋 Use coconut milk – For a milder, creamier gravy.


This Spicy Prawn Masala is sure to be a hit at your dinner table! Let me know how it turns out for you. 😍🍛


(FAQ's) 

1. How do I prevent prawns from becoming rubbery?

Cook prawns on medium heat for 5-7 minutes max. Overcooking makes them tough and chewy.

2. Can I use frozen prawns?

Yes! Just thaw properly and drain excess water before cooking.

3. Can I make this dish less spicy?

Absolutely! Reduce the red chili powder and skip the green chilies.

4. What oil is best for cooking prawn masala?

Coconut oil adds authentic coastal flavors, but regular vegetable oil works too.

5. Can I add coconut milk to this dish?

Yes! Coconut milk gives a creamy, mildly spiced gravy, perfect for rice.

6. How long can I store prawn masala?

Store in the fridge for 1-2 days. Reheat on low heat before serving.

7. What can I use instead of prawns?

You can substitute with fish, chicken, or even paneer/tofu for a vegetarian version!


Newer Posts Older Posts Home

POPULAR POSTS

  • Make Perfect Gajar Ka Halwa Like a Pro – Step-by-Step Guide
    Gajar ka halwa  also known as carrot halwa, is a rich and delicious Indian dessert made with grated carrots, milk, sugar, and ghee. It is a...
  • Degi Matar Masala is a flavorful and spicy North Indian Curry
    Degi Matar Masala   is a rich, flavorful North Indian dish made with green peas cooked in a spicy, aromatic tomato-based gravy. This recipe ...
  • Veg Manchurian – A Crispy and Flavorful Indo-Chinese Delight
    Cabbage Veg Manchurian is a delicious Indo-Chinese dish featuring crispy fried cabbage balls tossed in a tangy, spicy, and savory Manchuria...
Powered by Blogger

Comments

Search This Blog

  • March 202510
  • February 20258
  • January 20252

Labels

  • Festive Recipes
  • Indian Curry Recipes
  • Indian Street Food
  • Indian seafood
  • Mumbai Street Food
  • North Indian Food
  • Restaurant-Style Recipes
  • South Indian Recipes
  • Traditional Indian Food

Contact Form

Name

Email *

Message *

Pages

  • About us
  • Contact Us
  • Disclaimer
  • Privacy policy
  • Terms and Conditions

Designed by OddThemes | Distributed by Blogspot